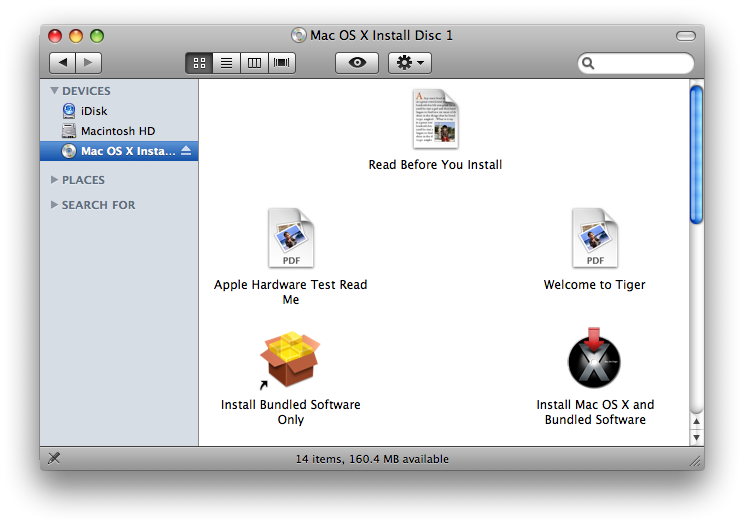
These are instructions on how to install USB Hard Drive Support on a Take 2 Apple TV. To follow this tutorial you will need to have an Intel Tiger Disk 1 version 10.4.8 or higher. The disc I used was Mac OS version 10.4.8, AHT version 3A114, Disc version 1.2, 2Z691-5946-A.
To follow this tutorial you must already have SSH installed on your AppleTV. Instructions can be found here to install SSH.
Step One
Download the Take2USB zip to your Desktop for your appropriate firmware version:
2.0.0: Take2USB-2.0.0.zip
2.0.1: Take2USB-2.0.1.zip
2.0.2: Take2USB-2.0.2.zip
Step Two
Download the firmware dmg to your desktop for your AppleTV version.
2.0.0: 2Z694-5274-109.dmg
2.0.1: 2Z694-5387-25.dmg
2.0.2: 2Z694-5428-3.dmg
Step Three
Insert your Intel Tiger Install Disk 1 into your computer and make sure it mounts


Step Four
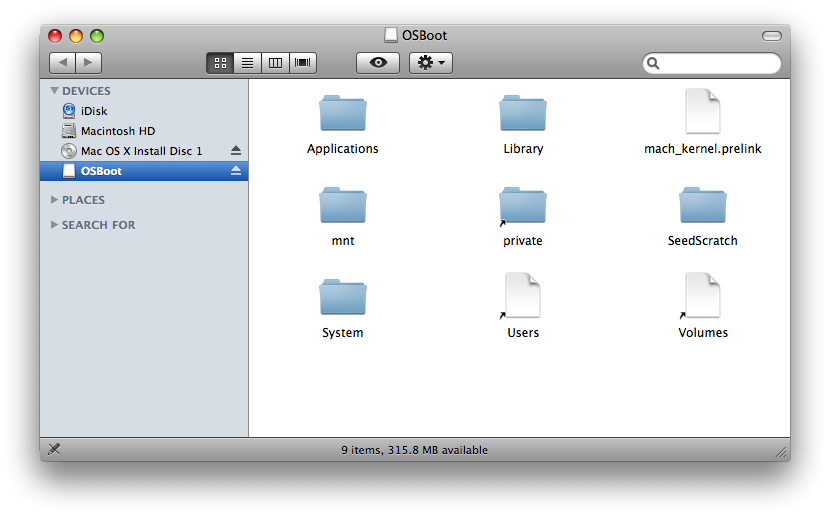
Double click the Apple TV firmware dmg you downloaded to your desktop. (ie 2Z694-5428-3.dmg). It will mount a volume called OSBoot.


Step Five
Double click the Take2USB zip file you downloaded to your desktop. This will extract a folder called Take2USB.
Step Six
Launch Terminal from your Applications:Utilities folder.
Step Seven
Enter cd ~/Desktop/Take2USB into the Terminal window and press Enter.
Step Eight
Enter sudo ./getfiles.sh into the Terminal window and press the Enter key.
Step Nine
When asked for a password enter your administrator password.
Step Ten
The script will locate all the files you require and create a file called Take2USB.tar on your Desktop.
Step Eleven
Input the following command into the Terminal window (NOTE*: You could use your AppleTV's IP Address instead of AppleTV.local)
scp -1 -r ~/Desktop/Take2USB.tar frontrow@AppleTV.local:~/.
Step Twelve
If asked whether to continue connecting type yes and hit Enter.
Step Thirteen
If asked for a password enter frontrow and press Enter.
Step Fourteen
Now input the following command into the Terminal window to ssh into your AppleTV
ssh -1 frontrow@AppleTV.local
Step Fifteen
If asked for a password enter frontrow and press Enter.
Step Sixteen
Input the follow command into the Terminal window to extract the Take2USB.tar file
tar xvf Take2USB.tar
Step Seventeen
Enter cd Take2USB into the Terminal window and press Enter to move into the newly created directory.
Step Eighteen
Execute the following command to complete the USB installation
sudo ./putfiles.sh
Step Nineteen
If asked enter frontrow as your password and press Enter.
Step Twenty
Once you have been notified that installation is complete you can unplug your AppleTV to restart it.
Step Twenty One
Once your AppleTV has completed you will have USB functionality!
You can even view your connected USB Hard Drive in ATVFiles!
THANKS**: Big thanks to turbo for making this possible and to everyone who contributed!
To follow this tutorial you must already have SSH installed on your AppleTV. Instructions can be found here to install SSH.
Step One
Download the Take2USB zip to your Desktop for your appropriate firmware version:
2.0.0: Take2USB-2.0.0.zip
2.0.1: Take2USB-2.0.1.zip
2.0.2: Take2USB-2.0.2.zip
Step Two
Download the firmware dmg to your desktop for your AppleTV version.
2.0.0: 2Z694-5274-109.dmg
2.0.1: 2Z694-5387-25.dmg
2.0.2: 2Z694-5428-3.dmg
Step Three
Insert your Intel Tiger Install Disk 1 into your computer and make sure it mounts


Step Four
Double click the Apple TV firmware dmg you downloaded to your desktop. (ie 2Z694-5428-3.dmg). It will mount a volume called OSBoot.


Step Five
Double click the Take2USB zip file you downloaded to your desktop. This will extract a folder called Take2USB.
Step Six
Launch Terminal from your Applications:Utilities folder.
Step Seven
Enter cd ~/Desktop/Take2USB into the Terminal window and press Enter.
Step Eight
Enter sudo ./getfiles.sh into the Terminal window and press the Enter key.
Step Nine
When asked for a password enter your administrator password.
Step Ten
The script will locate all the files you require and create a file called Take2USB.tar on your Desktop.
Step Eleven
Input the following command into the Terminal window (NOTE*: You could use your AppleTV's IP Address instead of AppleTV.local)
scp -1 -r ~/Desktop/Take2USB.tar frontrow@AppleTV.local:~/.
Step Twelve
If asked whether to continue connecting type yes and hit Enter.
Step Thirteen
If asked for a password enter frontrow and press Enter.
Step Fourteen
Now input the following command into the Terminal window to ssh into your AppleTV
ssh -1 frontrow@AppleTV.local
Step Fifteen
If asked for a password enter frontrow and press Enter.
Step Sixteen
Input the follow command into the Terminal window to extract the Take2USB.tar file
tar xvf Take2USB.tar
Step Seventeen
Enter cd Take2USB into the Terminal window and press Enter to move into the newly created directory.
Step Eighteen
Execute the following command to complete the USB installation
sudo ./putfiles.sh
Step Nineteen
If asked enter frontrow as your password and press Enter.
Step Twenty
Once you have been notified that installation is complete you can unplug your AppleTV to restart it.
Step Twenty One
Once your AppleTV has completed you will have USB functionality!
You can even view your connected USB Hard Drive in ATVFiles!
THANKS**: Big thanks to turbo for making this possible and to everyone who contributed!
