Instructions on how to install and setup your Apple Time Capsule to create a wireless network and time machine backup destination.
Step One
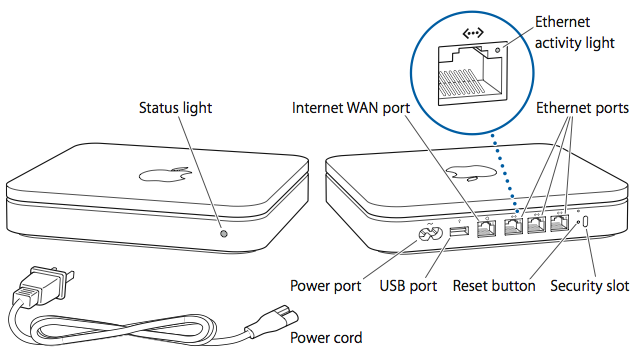
First lets unpackage the Time Capsule and hook it up. Plug in the AC adapter to the back of the Base Station. Don't plug it into the wall just yet. Plug your modem into the Internet WAN port.


Step Two
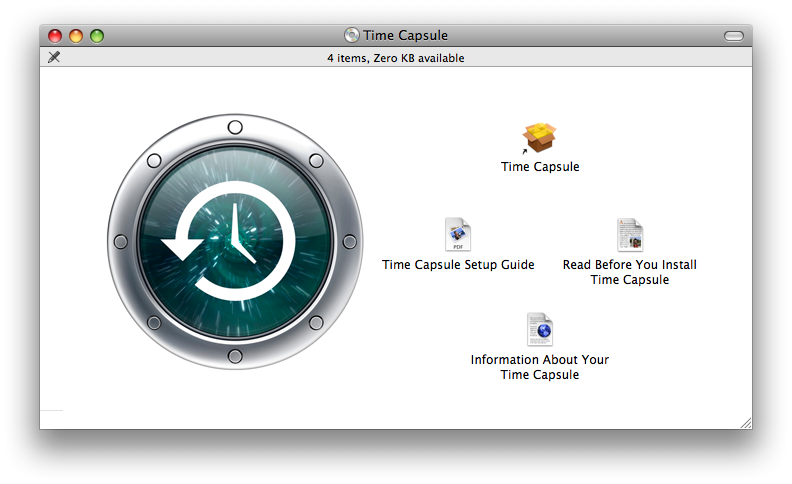
Insert the Install CD into your computer. A popup will appear showing the contents of the CD. Double Click Airport to begin the install process.


Step Three
Click the Continue button to install the Airport Software.
Step Four
Again click the Continue button to move past the Read Me Information.
Step Five
Click Continue to accept the software license agreement.
Step Six
Click Agree from the popup menu to confirm acceptance of the software license agreement.
Step Seven
Click the Install button to finally begin installation.
Step Eight
You may be asked to enter an administrative username and password. Enter these then click the Ok button.
Step Nine
Once the installation has complete click the Close button to close the installation window.
Step Ten
Now you can plug the AC Adapter into the wall outlet.
Step Eleven
Give the Time Capsule a few minutes to boot. If you are going to set up your Time Capsule using a wireless connection then click the Airport icon at the top right hand corner of the screen. Select the Apple Network from the dropdown. NOTE*: If you connected your computer to the Base Station using an ethernet cable you can skip this step.
Step Twelve
Open a new Finder window and run Airport Utility from within Applications : Utilities.
Step Thirteen
Airport Utility will search and find the connected Time Capsule. Click the Continue button to set up your base station.
Step Fourteen
Input a name for your Time Capsule and enter a password to protect the Time Capsule's settings. Then click Continue button to proceed.
Step Fifteen
Select whether you would like to create a new wireless network, replace an existing wireless router, or add the Time Capsule to an existing network. For this tutorial we will assume you want to create a new wireless network. Select this option then click the Continue button.
Step Sixteen
Enter a name for your new wireless network and select whether to password protect the network. If you choose to use WPA/WPA2 to secure your network, you must then input a password to use for network access. Click the Continue button to continue setup.
Step Seventeen
Setup will now ask if you would like to enable a Guest network. This would allow other computers to connect through the Time Capsule to the Internet without accessing your private network. If you choose to Enable guest network you will need to provide a name for the network, set the network security, and input a network password if required. Click the Continue button to continue setup.
Step Eighteen
Select how you connect to the Internet. If you use DSL and need to enter a username and password then select I use a DSL or cable modem using PPP over Ethernet (PPPoE). If you use a cable modem to access the internet and it does not require the input of a password then select I use a DSL or cable modem with a static IP address or DHCP. If you don't want to connect to the internet then select I am not ready to connect to the Internet right now. Click the Continue button to proceed.
Step Nineteen
Enter your connection information. If you chose I use a DSL or cable modem with a static IP address or DHCP you can probably leave all the settings as is. If you chose I use a DSL or cable modem using PPP over Ethernet (PPPoE) you be asked to enter a username and password.
Step Twenty
Setup will now ask you if you would like to use Time Machine to back up this computer to your Time Capsule. If you wish to do so, select Yes then click the Continue button.
Step Twenty One
Airport Utility will show you a window summarizing your setup. Click the Go Back button to go back and change something. If you are happy with the settings click the Update button.
Airport Utility will inform you that the device will be temporarily unavailable. Click the Continue button to proceed.
Step Twenty Two
Wait for the Time Capsule to restart and update your settings.
Step Twenty Three
Once the Time Capsule has restarted you will get a Congratulations window indicating that your Base Station has been successfully setup!
Press the Done button to finish the setup process. Notice the light on your Time Capsule Base Station will be green letting you know that everything is working properly.
Step Twenty Four
Airport Utility will now launch the Time Machine preference pane. Here you will be able to use the Change Disk.. button to select the Time Capsule as a backup destination.
Then you can move the large On/Off switch to the ON position to begin backing up your information.
You can find a more detailed explanation of the Time Machine settings here
Step One
First lets unpackage the Time Capsule and hook it up. Plug in the AC adapter to the back of the Base Station. Don't plug it into the wall just yet. Plug your modem into the Internet WAN port.


Step Two
Insert the Install CD into your computer. A popup will appear showing the contents of the CD. Double Click Airport to begin the install process.


Step Three
Click the Continue button to install the Airport Software.
Step Four
Again click the Continue button to move past the Read Me Information.
Step Five
Click Continue to accept the software license agreement.
Step Six
Click Agree from the popup menu to confirm acceptance of the software license agreement.
Step Seven
Click the Install button to finally begin installation.
Step Eight
You may be asked to enter an administrative username and password. Enter these then click the Ok button.
Step Nine
Once the installation has complete click the Close button to close the installation window.
Step Ten
Now you can plug the AC Adapter into the wall outlet.
Step Eleven
Give the Time Capsule a few minutes to boot. If you are going to set up your Time Capsule using a wireless connection then click the Airport icon at the top right hand corner of the screen. Select the Apple Network from the dropdown. NOTE*: If you connected your computer to the Base Station using an ethernet cable you can skip this step.
Step Twelve
Open a new Finder window and run Airport Utility from within Applications : Utilities.
Step Thirteen
Airport Utility will search and find the connected Time Capsule. Click the Continue button to set up your base station.
Step Fourteen
Input a name for your Time Capsule and enter a password to protect the Time Capsule's settings. Then click Continue button to proceed.
Step Fifteen
Select whether you would like to create a new wireless network, replace an existing wireless router, or add the Time Capsule to an existing network. For this tutorial we will assume you want to create a new wireless network. Select this option then click the Continue button.
Step Sixteen
Enter a name for your new wireless network and select whether to password protect the network. If you choose to use WPA/WPA2 to secure your network, you must then input a password to use for network access. Click the Continue button to continue setup.
Step Seventeen
Setup will now ask if you would like to enable a Guest network. This would allow other computers to connect through the Time Capsule to the Internet without accessing your private network. If you choose to Enable guest network you will need to provide a name for the network, set the network security, and input a network password if required. Click the Continue button to continue setup.
Step Eighteen
Select how you connect to the Internet. If you use DSL and need to enter a username and password then select I use a DSL or cable modem using PPP over Ethernet (PPPoE). If you use a cable modem to access the internet and it does not require the input of a password then select I use a DSL or cable modem with a static IP address or DHCP. If you don't want to connect to the internet then select I am not ready to connect to the Internet right now. Click the Continue button to proceed.
Step Nineteen
Enter your connection information. If you chose I use a DSL or cable modem with a static IP address or DHCP you can probably leave all the settings as is. If you chose I use a DSL or cable modem using PPP over Ethernet (PPPoE) you be asked to enter a username and password.
Step Twenty
Setup will now ask you if you would like to use Time Machine to back up this computer to your Time Capsule. If you wish to do so, select Yes then click the Continue button.
Step Twenty One
Airport Utility will show you a window summarizing your setup. Click the Go Back button to go back and change something. If you are happy with the settings click the Update button.
Airport Utility will inform you that the device will be temporarily unavailable. Click the Continue button to proceed.
Step Twenty Two
Wait for the Time Capsule to restart and update your settings.
Step Twenty Three
Once the Time Capsule has restarted you will get a Congratulations window indicating that your Base Station has been successfully setup!
Press the Done button to finish the setup process. Notice the light on your Time Capsule Base Station will be green letting you know that everything is working properly.
Step Twenty Four
Airport Utility will now launch the Time Machine preference pane. Here you will be able to use the Change Disk.. button to select the Time Capsule as a backup destination.
Then you can move the large On/Off switch to the ON position to begin backing up your information.
You can find a more detailed explanation of the Time Machine settings here
