
![How To Back Up Your iPhone to an External Drive on Mac [Video]](/images/tutorials/72786/356211/356211-64.png "How To Back Up Your iPhone to an External Drive on Mac [Video]")
How To Back Up Your iPhone to an External Drive on Mac [Video]
Your Mac saves iPhone backups to its internal drive, and Finder has no setting to change that. Replace the backup folder with a link to a folder on an external drive, and every backup after that is saved on the drive.
We tested these steps on a MacBook Pro running macOS 27, backing up an iPhone 18 Pro Max to an external SSD. On macOS 27 the Terminal command only works once Terminal has Full Disk Access.
Change Your iPhone Backup Location
Step One: Make a Backup Folder on Your Drive
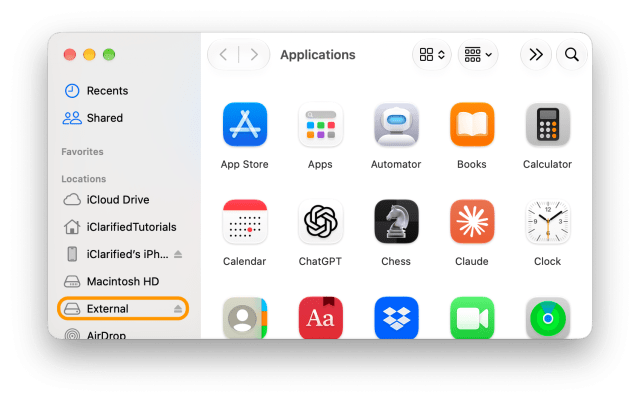
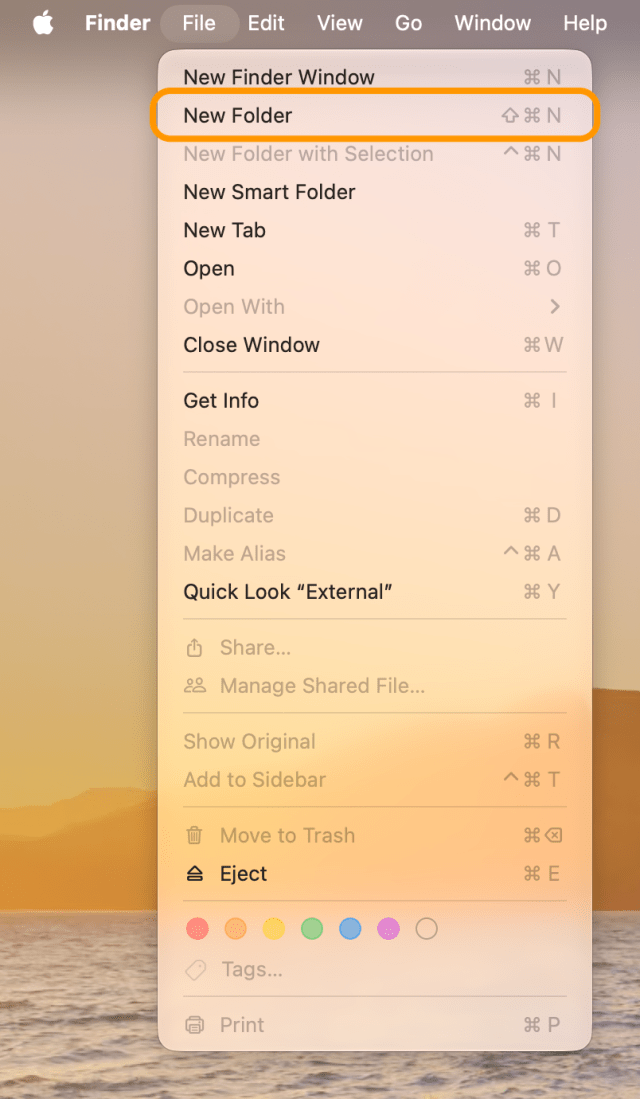
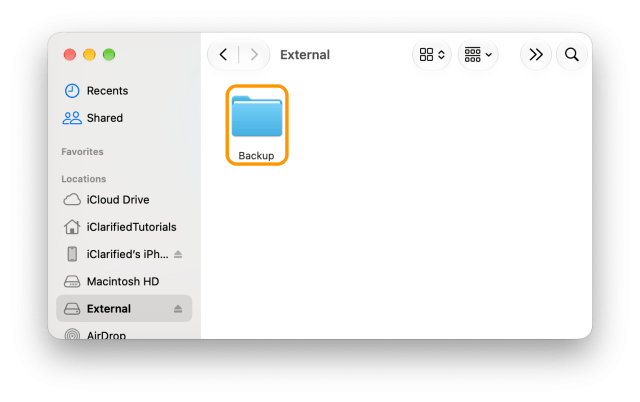
Connect your external drive and click Finder in the Dock. Select the drive in the sidebar, choose File > New Folder and name the new folder Backup.


Step Two: Rename Your Current Backup Folder
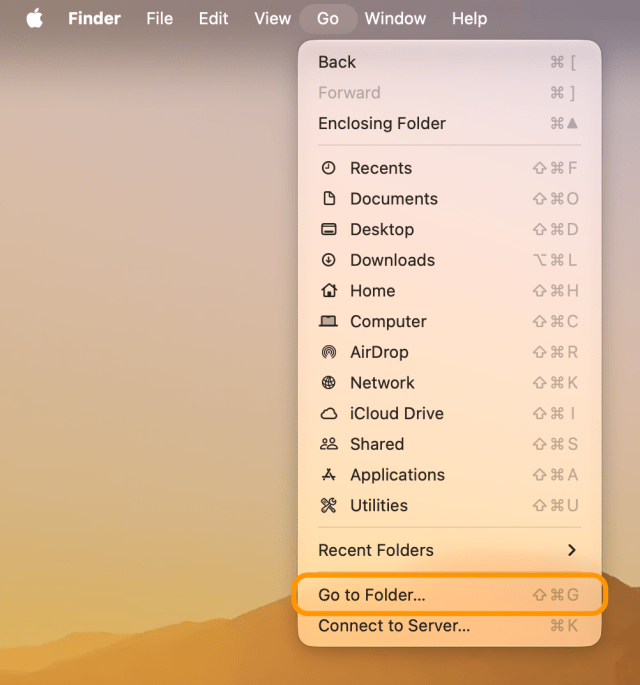
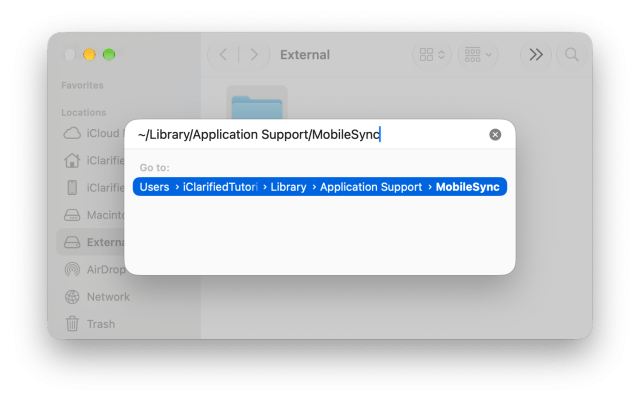
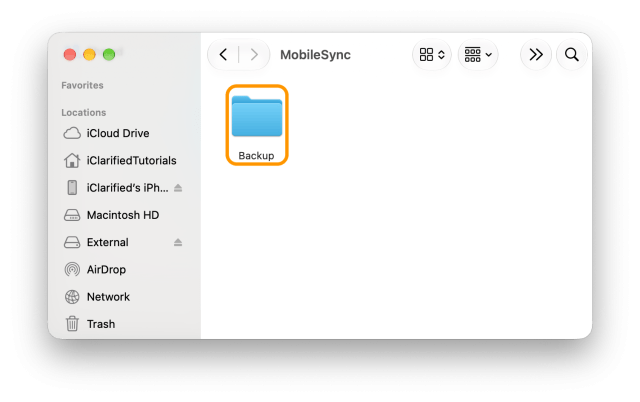
Choose Go > Go to Folder, enter ~/Library/Application Support/MobileSync and press Return. This is the folder where your Mac keeps iPhone backups.

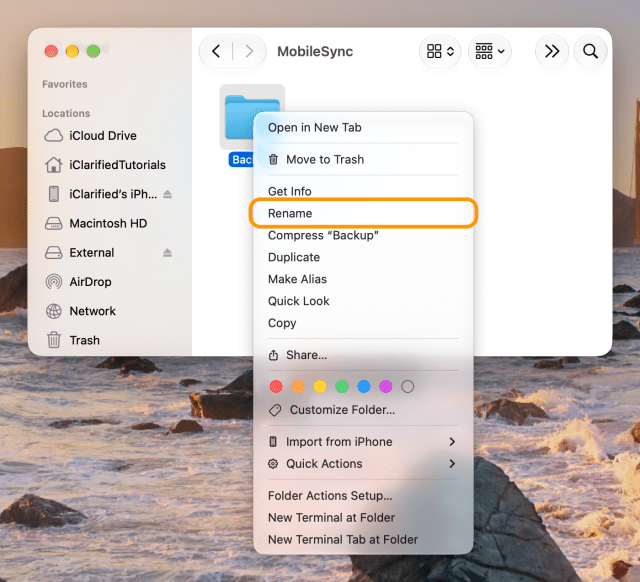
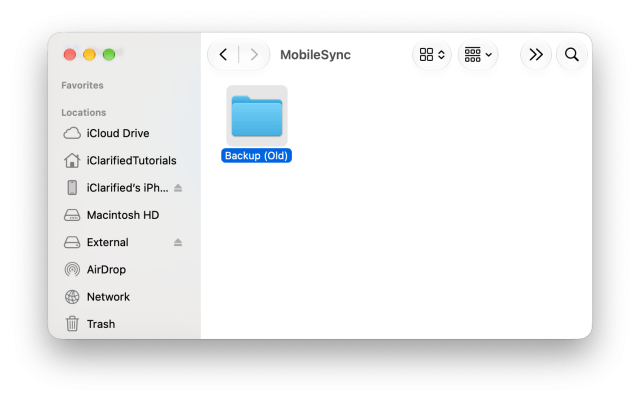
Right-click the Backup folder, choose Rename and name it Backup (Old). Your existing backups stay inside it.
Step Three: Give Terminal Full Disk Access
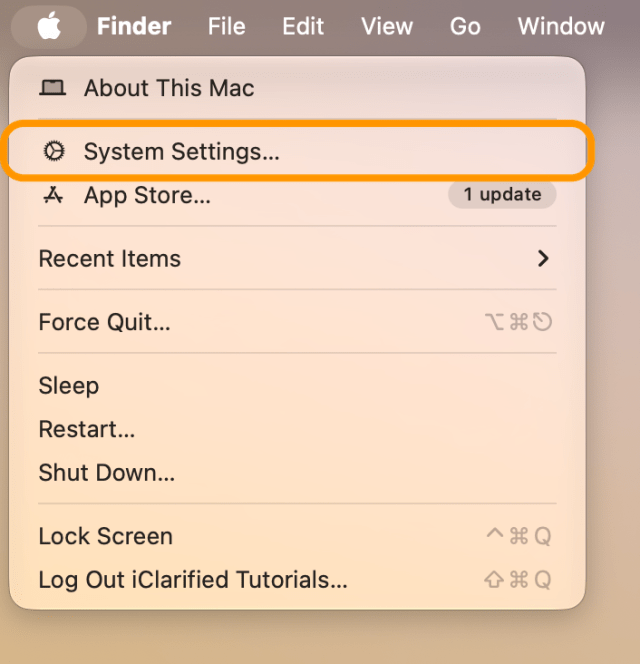
Terminal needs Full Disk Access to change the MobileSync folder; without it, the command in the next step fails with "Operation not permitted". Click the Apple menu and choose System Settings, then click Privacy & Security in the sidebar and Full Disk Access.

Turn on Terminal, then confirm with Touch ID or your password.
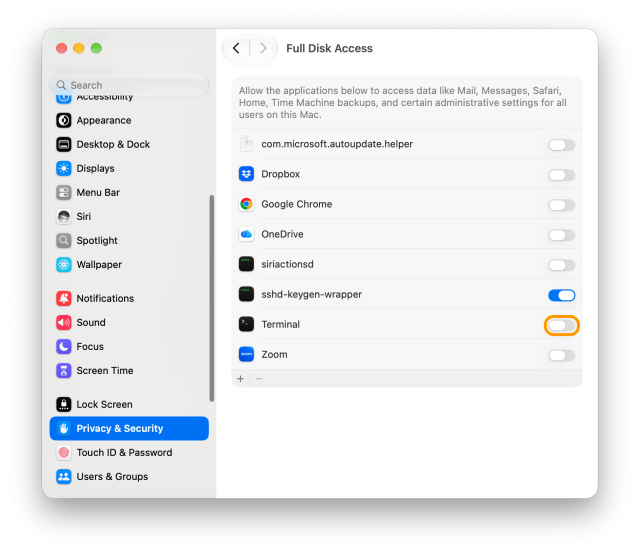
Step Four: Link the Folder to Your Drive
Click Spotlight in the menu bar, type Terminal and press Return.

Enter this command, replacing External with your drive's name, then press Return. Terminal shows nothing when the command works.
ln -s /Volumes/External/Backup ~/Library/Application\ Support/MobileSync/BackupIf your drive's name has spaces, type a backslash before each one, or drag the drive's Backup folder into the Terminal window to type its path.
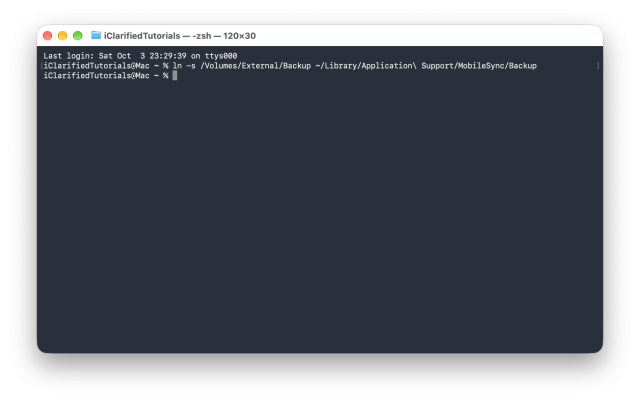
Step Five: Back Up Your iPhone
Back in Finder, the MobileSync folder now has a Backup folder with an arrow: the link to the folder on your drive. Connect your iPhone and select it in the sidebar.
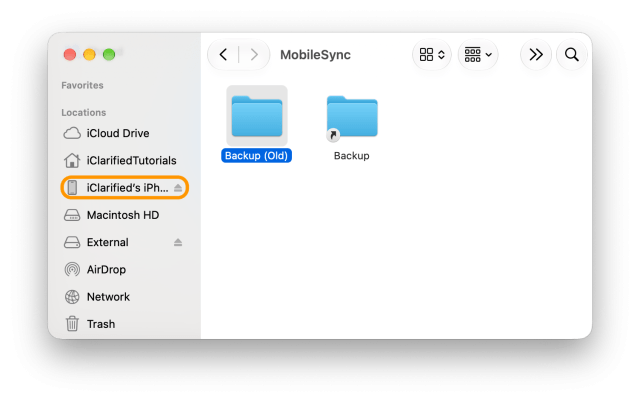
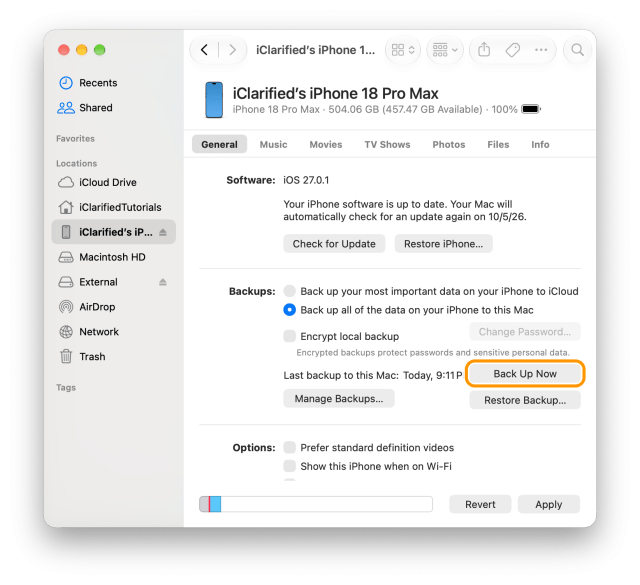
Under Backups, select Back up all of the data on your iPhone to this Mac, then click Back Up Now. On macOS Mojave or earlier, back up with iTunes instead; the folder and the link work the same way.
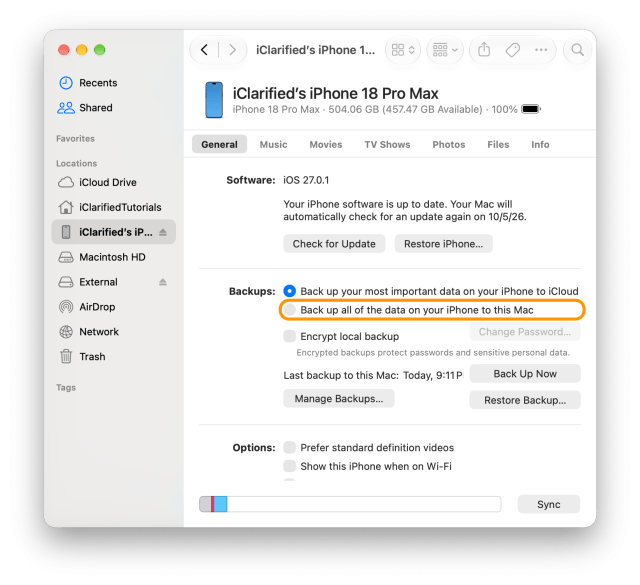
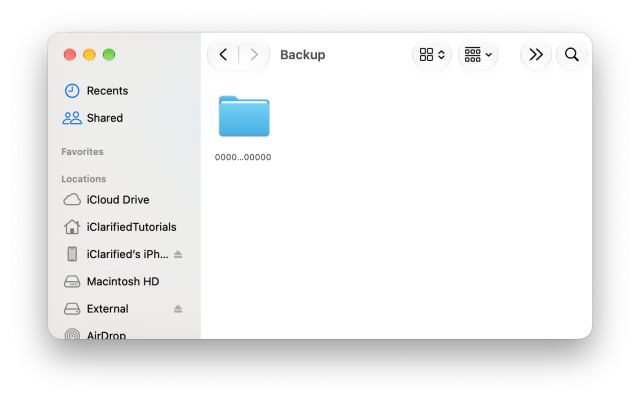
When the backup finishes, it's in the Backup folder on your drive.
Before Your Next Backup
The link points to your drive, so connect the drive before you back up. Once the link is in place, you can turn Full Disk Access for Terminal off again; backups still go to the drive.
Encrypt Your Backup
To include saved passwords and Health and Activity data, select Encrypt local backup before you click Back Up Now, and keep the password somewhere safe. Apple notes that you can't recover the backup without it.
Undo the Change
Open the MobileSync folder again, move the Backup link to the Trash, then rename Backup (Old) back to Backup. Your Mac then saves backups on its own drive again.







![Apple Releases iOS 27.2 Beta 4 and iPadOS 27.2 Beta 4 to Developers [Download]](/images/news/102795/102795/102795-160.jpg "Apple Releases iOS 27.2 Beta 4 and iPadOS 27.2 Beta 4 to Developers [Download]")
![How To Take a Screenshot on iPhone [Video]](/images/tutorials/399/399/399-160.jpg "How To Take a Screenshot on iPhone [Video]")
![How To Forward Calls on iPhone [Video]](/images/tutorials/92926/92926/92926-160.jpg "How To Forward Calls on iPhone [Video]")
![How To Back Up Your iPhone to an External Drive on Mac [Video]](/images/tutorials/72786/72786/72786-160.jpg "How To Back Up Your iPhone to an External Drive on Mac [Video]")






![Mac mini Drops to $779.99 for Prime Big Deal Days [Deal]](/images/news/102624/102624/102624-160.jpg "Mac mini Drops to $779.99 for Prime Big Deal Days [Deal]")
